Braeburn 1020 Thermostat: A Comprehensive Guide
This guide provides detailed instructions for installing, operating, and maintaining your Braeburn 1020 thermostat, ensuring optimal comfort and efficiency within your home environment.
Discover a step-by-step approach, from initial setup to troubleshooting, empowering you to fully utilize the features of this reliable thermostat model.
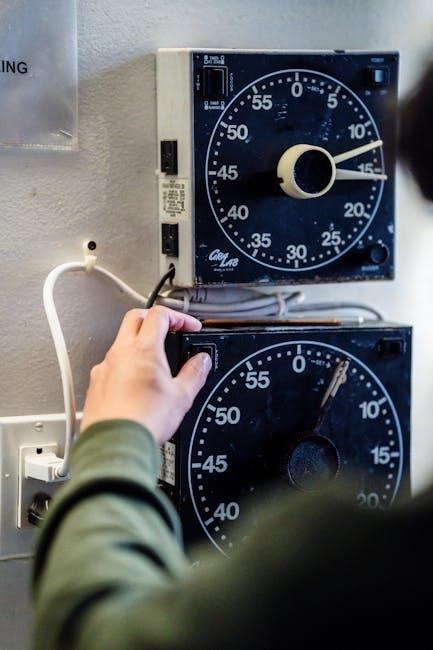
The Braeburn 1020 is a widely utilized, non-programmable thermostat designed for simple and effective temperature control in residential heating and cooling systems. It offers a user-friendly interface, making it an excellent choice for those seeking a straightforward alternative to more complex, programmable models.
This thermostat is compatible with a broad range of HVAC systems, including furnaces, air conditioners, and heat pumps. It operates on 24 Volt AC power, but also offers the flexibility of battery operation using two AA Alkaline batteries – which can serve as a backup power source.
The 1020 prioritizes ease of use, featuring clearly labeled controls for adjusting temperature and selecting between Heat, Cool, and Off modes. Its robust construction and reliable performance contribute to long-term energy savings and consistent comfort. This manual will guide you through every aspect of the Braeburn 1020, from installation to daily operation and maintenance.
Understanding the 1020NC Non-Programmable Model
The Braeburn 1020NC distinguishes itself as a non-programmable thermostat, meaning it lacks the ability to automatically adjust temperatures based on pre-set schedules. Instead, it relies on manual adjustments to maintain desired comfort levels. This simplicity makes it ideal for users who prefer consistent temperatures or have irregular schedules.
Unlike programmable thermostats, the 1020NC focuses on immediate control. Users directly set the temperature using the up and down buttons, and select the desired operating mode – Heat, Cool, or Off – via a clearly marked switch. This intuitive design eliminates the need to navigate complex menus or program time-based settings.
The “NC” designation signifies a normally closed circuit, relevant to its wiring configuration. Power options include 24 Volt AC or two AA Alkaline batteries, offering flexibility and backup functionality. It’s a dependable choice for straightforward temperature management.
Key Specifications of the Braeburn 1020
The Braeburn 1020 operates on a 24 Volt AC power source, or alternatively, utilizes two AA Alkaline batteries for reliable functionality, with the batteries serving as a convenient backup power supply. Its temperature range is typically 40°F to 90°F (4°C to 32°C), suitable for most residential heating and cooling systems.
This thermostat supports single-stage heating and cooling systems, making it compatible with conventional furnaces and air conditioners. It features a large, easy-to-read display, providing clear visibility of the set temperature and operating mode. The unit’s dimensions are compact, ensuring easy integration into various wall configurations.
Furthermore, the 1020 boasts a simple, user-friendly interface with intuitive controls for temperature adjustment and mode selection. It’s designed for straightforward installation and operation, offering a cost-effective solution for basic climate control needs.

Installation Process
Proper installation is crucial for optimal performance. This section details the steps for safely and correctly installing your Braeburn 1020 thermostat, ensuring reliable operation.
Pre-Installation Considerations & Safety
Before beginning the installation process, carefully review these essential considerations to ensure a safe and successful setup. Always disconnect power to your heating and cooling system at the breaker box to avoid electrical shock. Confirm compatibility with your system – the Braeburn 1020 requires 24 Volt AC power or two AA alkaline batteries.

If using batteries, ensure they are correctly installed as a backup power source when 24V AC is connected. This thermostat is designed for indoor use only and should not be exposed to direct sunlight, extreme temperatures, or moisture.
Take photographs of your existing wiring before disconnecting anything; this will serve as a valuable reference during the installation. If you are uncomfortable working with electrical wiring, consult a qualified HVAC technician. Failure to follow these safety precautions could result in damage to the thermostat, your HVAC system, or personal injury.
Wiring Diagrams & Terminal Identification
Proper wiring is crucial for the correct operation of your Braeburn 1020 thermostat. Refer to the wiring diagram included with your thermostat and the photographs you took of your previous wiring setup. Common terminals include Rh (power), Rc (cooling power), W (heat), Y (cooling), and G (fan).
The ‘C’ terminal is for common wire and provides continuous power; its use may require adjustments to your HVAC system. Carefully connect each wire to the corresponding terminal on the thermostat base. Ensure wires are securely fastened to prevent loose connections.
If your system utilizes a heat pump, additional wiring may be required. Always double-check your connections against the wiring diagram before restoring power. Incorrect wiring can damage the thermostat or your HVAC system. If unsure, consult a qualified HVAC professional.
Mounting the Thermostat Base

Before mounting, ensure the power to your HVAC system is completely turned off at the breaker. Remove the existing thermostat from the wall plate, carefully noting the wire connections. Use the included screws and wall anchors to securely attach the Braeburn 1020 baseplate to the wall.
Ensure the baseplate is level for accurate temperature readings and a professional appearance. Gently feed the thermostat wires through the opening in the baseplate. Connect the wires to the appropriate terminals, as detailed in the wiring diagram.
Once all wires are securely connected, carefully snap the thermostat body onto the baseplate. Verify a snug fit. Restore power to your HVAC system and proceed with system testing to confirm proper operation.

Operating Your Braeburn 1020
This section details how to effectively use your thermostat, including temperature adjustments, mode selection, and fan control for optimal comfort and energy savings.
Setting the Temperature

Adjusting the temperature on your Braeburn 1020 is straightforward. Utilize the up and down arrow buttons located on the thermostat face to modify your desired setpoint. The current room temperature is prominently displayed, allowing for easy comparison and precise adjustments.
The thermostat will automatically activate your heating or cooling system to reach and maintain the selected temperature. Note that the display will briefly show the set temperature while adjusting, then revert to displaying the current room temperature.
For optimal comfort, start with a temperature that feels comfortable and then make small adjustments as needed. Remember that significant temperature changes may take time for the system to achieve. Consistent monitoring and minor adjustments will ensure a comfortable and energy-efficient environment.
The Braeburn 1020 provides accurate temperature control, contributing to a pleasant indoor climate.
Switching Between Heat, Cool, and Off Modes
The mode selector on your Braeburn 1020 allows you to choose between Heat, Cool, and Off operations. This switch is typically located on the side or bottom of the thermostat unit. To change modes, simply move the switch to your desired setting.
In Heat mode, the thermostat activates your heating system when the room temperature falls below the setpoint. Cool mode activates the cooling system when the room temperature rises above the setpoint. Selecting Off disables both heating and cooling, allowing for manual system control or complete shutdown.
Ensure the mode selector is positioned correctly for your desired operation. Incorrect settings can lead to inefficient energy usage or an uncomfortable indoor environment. Always verify the selected mode before expecting heating or cooling to engage.
Proper mode selection is key to maximizing the benefits of your Braeburn 1020 thermostat.
Fan Control Options (Auto & On)
Your Braeburn 1020 offers two fan control settings: Auto and On. The fan control switch, usually situated near the mode selector, determines how the blower operates in conjunction with heating or cooling.
Selecting Auto means the fan runs only when the heating or cooling system is actively operating. This is the most energy-efficient setting, as the fan isn’t running unnecessarily. When the system cycles off, the fan also stops.
Choosing On forces the fan to run continuously, regardless of whether heating or cooling is active. This can improve air circulation and even out temperatures throughout your home, but it consumes more energy.
Consider your comfort preferences and energy-saving goals when selecting a fan control mode. Experiment to find the setting that best suits your needs and optimizes your home’s climate control.

Troubleshooting & Maintenance
This section details solutions for common issues, proper battery installation, and essential maintenance procedures to ensure your Braeburn 1020 thermostat functions optimally.
Common Issues and Solutions
Display is blank: First, verify the batteries are fresh and correctly installed, or confirm 24V AC power is connected. If power is present, the display may require resetting – consult the full manual for reset procedures.
Thermostat isn’t calling for heat/cool: Ensure the system switch is set to the correct mode (Heat, Cool, or Off). Check the wiring connections at the thermostat base and the HVAC unit, confirming they match the wiring diagram. A tripped circuit breaker could also be the culprit.
Inaccurate temperature readings: Avoid placing the thermostat in direct sunlight, near drafts, or close to heat-generating appliances. Allow sufficient time for the thermostat to calibrate after installation. Recalibration may be necessary if inaccuracies persist.
Fan runs constantly: Verify the fan control is set to “Auto” and not “On.” If the issue continues, there might be a problem with the fan relay in your HVAC system, requiring professional assistance.
For further assistance, refer to the complete Braeburn 1020 manual or contact Braeburn support for detailed troubleshooting steps.
Battery Installation & Replacement
The Braeburn 1020 operates on either 24 Volt AC power or two AA alkaline batteries, offering flexibility in installation. When using 24V AC, batteries serve as a backup during power outages, maintaining thermostat settings.
To install batteries, locate the battery compartment, typically on the back or side of the thermostat. Open the compartment and insert two fresh AA alkaline batteries, observing the correct polarity (+ and -) as indicated.
For replacement, the thermostat may display a low battery icon, signaling the need for new batteries. Replace both batteries simultaneously with fresh ones to prevent potential issues.
Important Note: Always power off the thermostat or disconnect the 24V AC power before accessing the battery compartment. Dispose of used batteries responsibly, following local regulations.
Refer to the full manual for specific battery compartment location and detailed instructions tailored to your Braeburn 1020 model.
Thermostat Maintenance Procedures
Regular maintenance ensures the continued accurate operation of your Braeburn 1020 thermostat. Dust and debris can accumulate, potentially affecting temperature sensing and overall performance.
Cleaning the Thermostat: Gently wipe the exterior of the thermostat with a soft, dry cloth. Avoid using liquids or abrasive cleaners, as these can damage the display or housing.
Check Wiring Connections: Periodically, visually inspect the wiring connections at the thermostat base to ensure they remain secure. Loose connections can lead to inaccurate readings or system malfunctions.
Battery Checks: If using batteries, replace them annually or when the low battery indicator appears. Even with 24V AC power, batteries should be checked for freshness.
Professional Inspection: For complex issues or concerns, consult a qualified HVAC technician for a thorough inspection and maintenance check of your heating and cooling system.

Warranty Information
Braeburn offers a limited warranty protecting against manufacturing defects in materials and workmanship. Details regarding coverage duration and exclusions are provided within.
Review the specifics to understand your rights and options should a warranty claim become necessary for your thermostat.
Limited Warranty Details
Braeburn Heating & Cooling Systems warrants this Braeburn 1020 thermostat to be free from defects in material and workmanship for a period of one (1) year from the date of original purchase. This warranty extends only to the original purchaser and is non-transferable.
During the warranty period, Braeburn will, at its option, repair or replace any defective thermostat without charge. This warranty does not cover damage caused by improper installation, misuse, abuse, accident, alteration, or normal wear and tear.
Specifically excluded are issues arising from incorrect wiring, battery leakage, or operation outside of the thermostat’s specified environmental conditions. To obtain warranty service, the defective thermostat must be returned to Braeburn, along with proof of purchase. This warranty gives you specific legal rights, and you may also have other rights which vary by state.
This warranty is in lieu of all other warranties, expressed or implied, including any implied warranty of merchantability or fitness for a particular purpose.
Contacting Braeburn Support

For assistance with your Braeburn 1020 thermostat, or to inquire about warranty claims, Braeburn Heating & Cooling Systems offers several convenient support channels. Their dedicated customer service team is equipped to address a wide range of questions and concerns.
You can reach Braeburn Support via telephone during regular business hours. Detailed contact information, including the support phone number and email address, can be found on the official Braeburn website. Additionally, a comprehensive FAQ section and troubleshooting guides are available online, offering self-service solutions to common issues.
When contacting support, please have your thermostat model number and date of purchase readily available to expedite the assistance process. Braeburn is committed to providing prompt and effective support to ensure your complete satisfaction with their products.
Visit their website for the most up-to-date contact details and resources.